Monday, March 16, 2015

Mexican Night Continued: Chili Lime Shrimp Tacos with Soft Corn Tortillas


Tacos. Awesome.  Honestly, my favorite part are the fresh, corn tortillas.  The filling is just window dressing. You can add anything to these.  Don’t like shrimp? Add chicken, skirt steak or beans.  While it’s always nice for someone else to be making and serving you a margarita, I have constantly been disappointed by restaurant tacos- even at self-proclaimed traditional spots.  Sometimes, they don’t even make or offer corn tortillas!  Maddening.  Buy a tortilla press.  I like the cast iron ones.  They are not expensive and take up less room than any kitchen appliance I own- and that is saying something.  The results are also a thousand times better than any of those rubbery, 1000-count bags you buy at the grocery.  You use a few and the rest end up in the back of your freezer….I know how it goes.      


I digress...


Well seasoned and properly prepared protein and sliced avocado topped with a squeeze of lime filled into a warm, soft corn tortilla is magic on a plate. Simple ingredients, delicious results. Now, go. Cook.  


Corn Tortillas


2 cups Maseca Corn Flour, do not substitute corn meal!


1 1/4 cups water

1/4 tsp salt


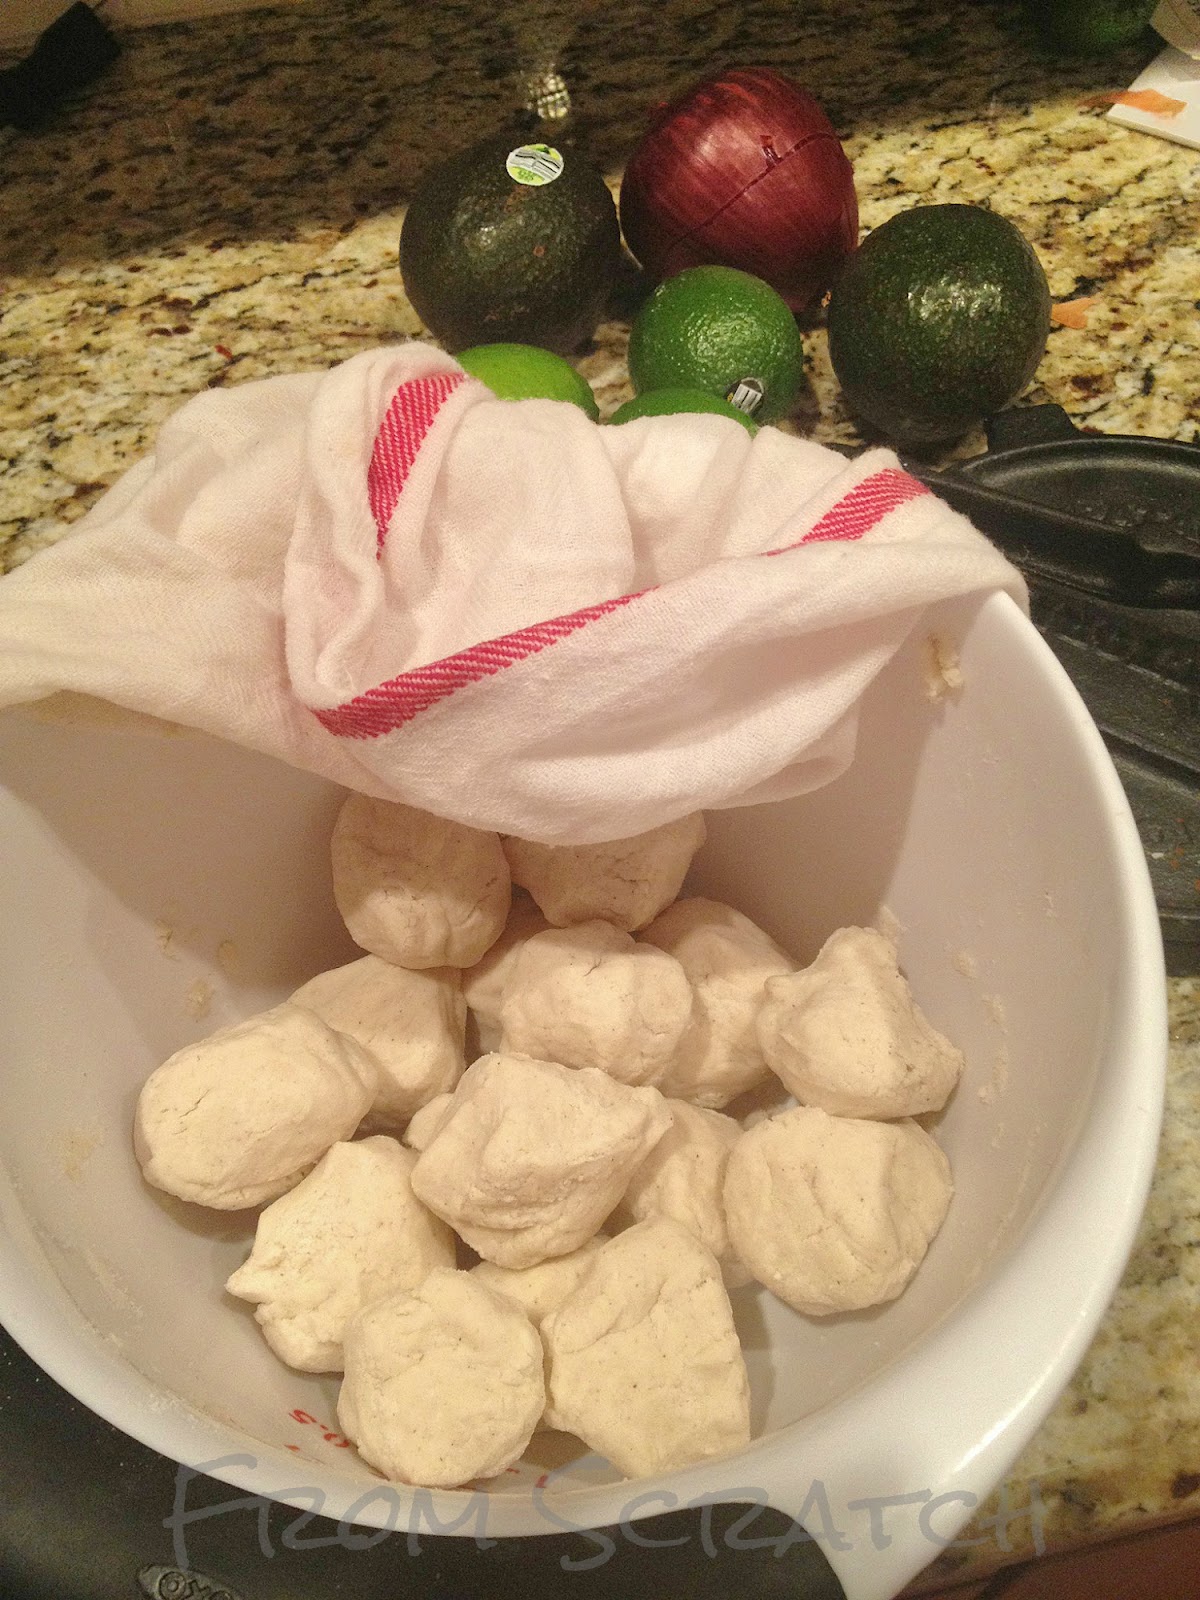
  1. Add masa and salt to bowl and add water.  Mix to combine and form dough.  Divide dough in half and keep doing so until you reach 16 relatively even dough balls.  
tortilla balls.jpg


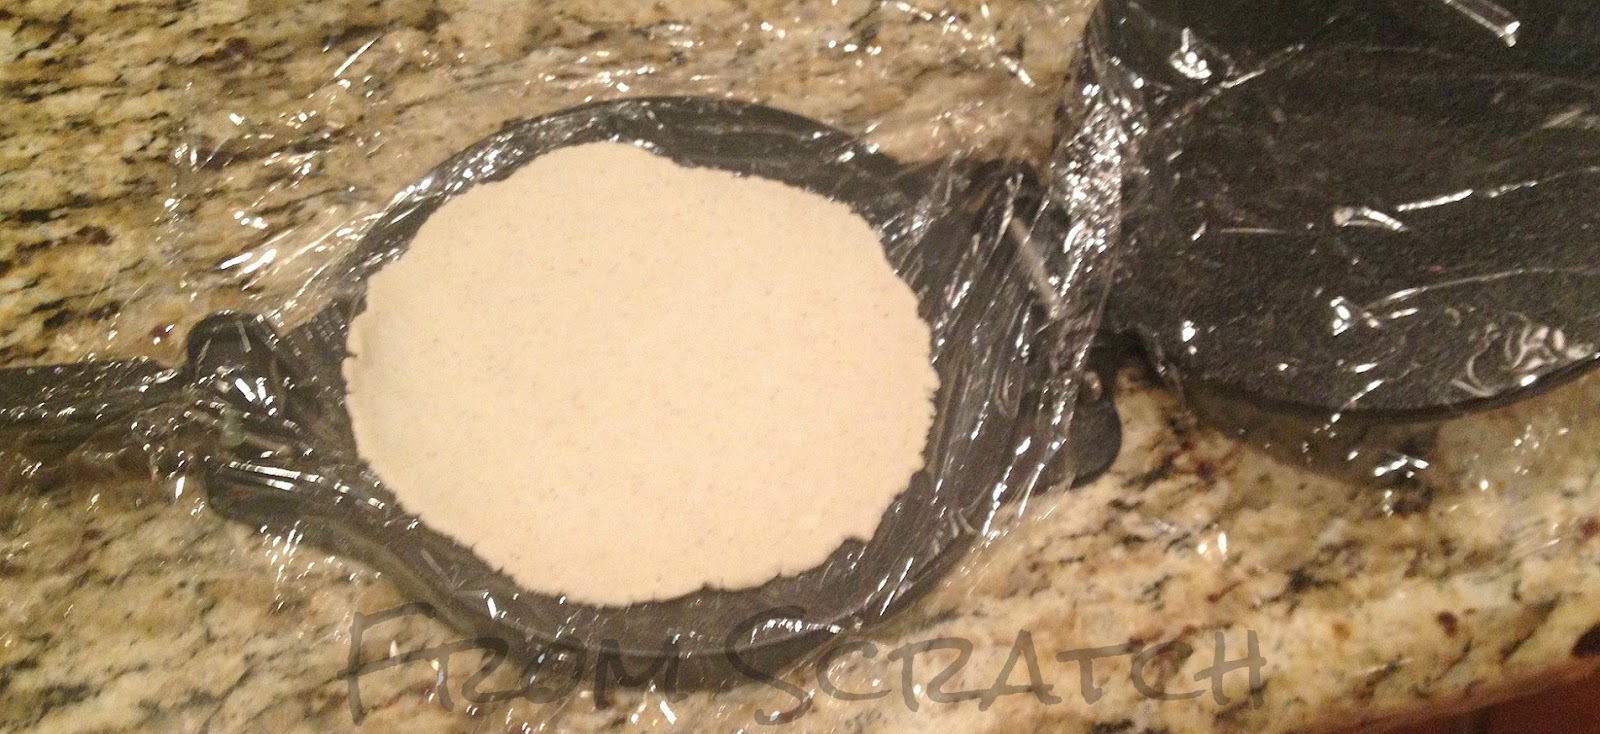
  1. Prepare tortilla press by placing a piece of plastic wrap on both plates, then press down using the handle.  Here’s what it looks like:
tortillas final.jpg


  1. Heat a skillet to medium high; cast iron, non-stick or stainless will work.  Check heat by sprinkling a little water in the pan.  If it quickly sizzles and evaporates, you’re ready to go. Preheat oven to lowest temperature.


  1. Place tortilla in pan and cook for about 1-2 minutes. Flip over and cook another 1-2 minutes. Remove tortilla from pan and place onto a cookie sheet or oven safe plate.  Lightly cover with foil and place in warm oven if you’re making a bunch.  I like to keep them in the oven if I haven’t finished cooking my filling yet so they stay warm.  Continue until all tortillas are made.  That’s it.       
Chili Lime Shrimp


About 6 Tacos


18 large shrimp, cleaned and deveined
1 ½ tsp Chili powder
½ tsp cumin
Fresh lime juice to taste
Large pinch salt
Olive oil
1 avocado, sliced
Cilantro, chopped for garnish


  1. Toss cleaned shrimp with Chili, cumin, salt.  Cook now or let sit 15-20 minutes.


  1. Heat large skillet to medium high.  Lightly coat bottom of pan with olive oil and when oil is glistening, add shrimp.  If you have a smaller skillet, saute the shrimp in batches to avoid steaming them.  Cook shrimp until just opaque and pink in color.  About 3-4 minutes. Unsure? Test one at 3 minutes by cutting in half to see if center is cooked through.  Unless you buy jumbo sized shrimp, cooking time should not exceed 4 minutes.
  1. Place cooked shrimp in mixing bowl and add lime juice and chopped cilantro.  Add salt if necessary.

  1. Assembly:  3-4 shrimp per taco, 2  slices of avocado, maybe a dollop of tomatillo salsa and you’re in business.    

Enjoy!

MJM

Friday, March 13, 2015

Mexican Night, The Beginning: Blistered Tomatillo Salsa


After a series of frustrating, mediocre Mexican fare, I decided it was time to take matters into my own kitchen. Now, I cannot claim complete authenticity but I can assure you that these dishes are delicious, simple and all From Scratch. This is the first of three Mexican inspired recipes that I think would make anyone happy. Here's the first. Tomatillo salsa! If you have a blender, a food processor or an immersion blender, there's no reason to buy the jarred stuff. It's loaded with all kinds of junk and, as you know, that's not how we roll. I'm roasting these ingredients because tomatillos are very tart and just seem to work better when cooked. If you cannot find them, sub with all standard tomatoes and then decide to roast or not. Roasting is a great way to create depth of flavor with almost any ingredient because the high heat is releasing any liquid and concentrating the flavors. Taste for yourself.


Makes about 2 cups


8 medium tomatillos
1 cup of yellow or red grape tomatoes
½ red onion, thick slices
olive oil
fresh lime juice
salt
Chipotle peppers* for smoky flavor and heat or plain jalapeno** for heat only


Preheat oven to 425℉

*Chipotle chilies. These guys are simply smoked jalapenos. If you can find them dried, that's best. But, in a pinch, you can use either powdered chipotle (in the spice aisle) or the canned ones in adobo sauce. Even I'll forgive this ingredient. Dried, whole chipotles might be hard to come by unless you have a really great grocery store or are near a Whole Foods or similar type of place. Depending on where you live may also put you at an advantage for finding these guys dried. Just re-hydrate dried chilis in warm water and remove seeds for less heat. Dice 1/4 or 1/3 of the chili and use sparingly. A little goes a lonnnng way. Promise. You can store in an airtight container covered in olive oil or other mild oil. In the process, you'll infuse the oil and can then use that in recipes in the future. This is will last in your fridge for quite some time.

**Jalapenos These guys are considered the mild chili. If you want to add just a bit of heat, carefully remove seeds and add chopped jalapeno to the salsa mixture before blending. For added heat, keep some of the seeds.

When seeding any chili, take care not to touch your face or eyes without scrubbing your hands clean. Seriously. It's not pretty. A trick I learned while seeding a ton of chilis is to use a bowl of water. The water helps ensure you have removed all seeds and is less cumbersome then using a knife to scrape them out. First, slice the chili lengthwise then remove seeds and white part (the ribs) while submerged in a bowl of water. You can certainly do this over your sink, too if you're just seeding one chili. This also works for removing the pesky seeds from bell peppers! After handling any chili pepper, immediately wash your hands with soap and water. The oils from even one chili can sting like nothing else. Always rewash hands after finished handling the chilis.

On to the Salsa:


  1. Be sure to peel away the outer husk of the tomatillo and wash away any sticky residue. Place all ingredients, except for the chipotle, in a roasting pan.  Toss to coat everything with the oil.
  2. Roast in oven for 15-20 minutes or until vegetables have softened and browned.  You can also place it under a low broiler until color and texture is achieved.
  3. Let veggies cool a few minutes before placing them in a medium sized bowl.  Add the chipotle sparingly at first. Once it's in, the heat level is set. Here's a guide: 1/2 - 1 teaspoon diced, OR 1/4 - 1/2 chipotle powder OR 1/2 small chiptole in adobo with seeds removed. Use a blender, food processor or immersion blender until mixture is smooth.
  4. Taste!  Adjust seasoning as needed and feel free to add more chipotle.  You can also add some cilantro, if that’s your thing.  Along with black pepper, I have zero appreciation for this herb.  But go for it.  It would certainly compliment all the flavors. Blend again if necessary.
  5. Serve with chips, fajitas or the tacos to follow! Olé.


Enjoy,
MJM

Friday, February 20, 2015

Tangy Kale and Crispy Prosciutto Salad

A little refreshing bite to fight the insane freezing cold. This salad is simple but super tasty with bursts of fresh dill and lemon and crunchy, salty prosciutto.  You can sub quinoa for the barley or really any other grain if you like, but adding the grains really bulks up the salad and breaks up the grassy quality of the kale.  To that end, if you’re a kale hater (!), you can use other greens, too.  Hope this vitamin infusion will brighten you up.    


2 decent sized servings or 3-4 small ones

4 cups chopped kale
½ cup barley
1 bay leaf
½ tsp fresh or dried thyme
2 tsp chopped fresh dill
3-4 slices prosciutto
1 scallion, sliced thin
Small cucumber, sliced thin
2 TBS white wine vinegar
¼ cup extra virgin olive oil
lemon juice to taste
salt/pepper to taste
grated Pecorino cheese to taste


  1. In a small saucepan, combine barley with 1 ½ - 2 cups water, pinch of salt and bay leaf.  Bring to boil then reduce to simmer until liquid is absorbed and barley is tender.  (If you have excess water after desired consistency is reached, drain off the water).  Add 1 teaspoon of chopped dill, additional salt to taste and a good squeeze of lemon juice.  Taste and adjust seasoning.  Place in fridge to chill.
  2. Heat a skillet to medium high heat then, add slices of prosciutto.  Turn to brown on both sides and remove from pan to cool and crisp up.  Set aside.
  3. Clean and dry kale and place in mixing bowl.  Add sliced scallion, cucumber and remaining chopped dill to bowl. Mix vinaigrette in a separate bowl or measuring cup. Adjust oil/vinegar ratio to taste and salt well.  Slowly add vinaigrette to kale, mixing salad after each addition.  Taste along the way since you may prefer for more or less vinaigrette.  To make more vinaigrette, follow this simple ratio of 2:1,  oil:vinegar.  
  4. Remove chilled barley from fridge.  Mix and taste. Adjust seasoning and add to veggie mixture.
  5. Chop cooled and crisped prosciutto.  Add half to salad and mix through and top the salad with the rest.

Enjoy!
MJM   

Monday, January 19, 2015

Sweet Cherry Pie and Flaky Crust

 What better way to ignore winter then to bake a bright, juicy cherry pie.  After the holidays and spiced everything, I like the idea of fresh flavors that bring me back to the summer.  Long days at the beach, sandy toes and salty waves seem so far away now that the winter has declared her presence. But for today, let's remember the sunshine and know that we are getting closer to those hot summer days.  

This pie is my dad's favorite and so this one is for him!

Let's start with the filling.  In season, I would buy fresh cherries and pit them, but since it's January, you should be able to find some great organic frozen, pitted cherries.  The only way to make this pie taste like it came from a package is if you buy that canned cherry pie filling.  Please. Don't do that. You deserve better! 

Cherry Pie Filling

2 lbs fresh or frozen sweet red cherries
1 cup sugar, raw or granulated*
zest of one lemon
2-3 TBS lemon juice
1 tsp vanilla extract
1/4 tsp almond extract
3 TBS cornstarch
2 TBS unsalted butter, cold and cut into small pieces
1 egg plus water for egg wash
raw sugar for sprinkling, optional

*If cherries are super sweet, add 3/4 cup sugar first, mix and then taste.  Adjust sweetness to your preference.


1. Combine cherries, sugar, lemon juice, zest, extracts and cornstarch.  Mix well and set aside.  


Now, on to the pie dough.  You didn't think this would start with any pre-made frozen thing did you? Relax.  This isn't hard at all. It takes some practice, but if you follow these steps, you'll find that pie crust is not as intimidating as you might have thought. 

This recipe yield enough for an 8- or 9-inch single pie crust.  You can also use this recipe for a quiche.  I used a 9-inch pie plate for this one. 


For a double crust pie, I'd recommend doing this recipe two separate times instead of doubling the recipe and dividing up the dough.  It's so simple to put together, doing this twice is no big deal. Promise.


All Butter Flaky Pie Dough

1 1/2 cups All Purpose Flour

10 TBS very cold unsalted butter (cut into TBS sized pieces)
1/2 tsp salt
1/8 tsp baking powder
2-5 TBS ice water

I was taught by a brilliant chef how to execute this perfectly.  You're welcome!  All butter and no shortening makes for the best tasting pies.  This recipe is such a keeper.


Easiest, cleanest and quickest method is to use a food processor.  Also, less "hands" is best until you get really fast at this.  


You don't want warm hands prematurely melting the butter.  Practice makes perfect, but once you get this down, you'll be able to do this in your sleep. Sort of. 

1. In a food processor bowl fitted with metal blade, add flour, salt and baking powder. Pulse to combine.


2. Add all cold butter pieces.  Pulse 2-3 times (count a full "1 Mississippi" each time). Time to check. Carefully look to see if the butter is still in large pieces. You want the butter to be about cranberry sized. If the butter is still too big, give it another pulse. When the size is right, it's time for the water.


Here's a good gauge for when you can start adding water:


3. Add 2 TBS of ice water.  Pulse 2 times. Remove the top of food processor and carefully (there's a blade in the bowl!) take a small amount of flour/butter/water mixture between your fingers.  Press it together. Does it stay together or is it crumbly?  If crumbly, add 1 more TBS of ice water and repeat. (Pulse 2 times, remove top, check dough.)

Not ready:


Ready:

4.  When dough is ready, have a large piece of wax paper or parchment paper (11x14ish) on your counter.  Carefully pour dough mixture from processor onto wax paper. Notice the texture.  Mixture will look like cornmeal with tiny flecks of butter throughout.


5. With opposite corners of the paper, bring to the center and press down on the mixture.  Repeat with the other two corners of the paper and continue to do with until your mixture is a cohesive disc shaped dough.  Place disc in refrigerator for 45 min up to 1 day before rolling out.  


See the little bits of butter through the parchment? Perfect!


PIE ASSEMBLY AND BAKING INSTRUCTIONS

Preheat oven to 425°, adjust oven rack to middle position.

1. Roll out each pie crust on a lightly floured surface to 12-inch round.  See PIE DOUGH RULES for tips on rolling out the dough. Keep top of dough refrigerated until ready to place on pie.

2. Add filling to dough lined pie plate and dot filling with 2 TBS cut up butter before adding the top of pie crust.

3. Mix egg and water and brush mixture over top of the crust before placing pie in the oven.  You can sprinkle raw sugar over top of the egg wash if you like.

4. Bake pie for 20 minutes at 425°, then lower temperature to 375°and bake for about an hour longer.  Crust will be deep golden brown and filling will be bubbly. If the edges are getting too brown, take some aluminum foil and carefully cover the edges midway through baking.


PIE DOUGH RULES:

1.  Only use cold ingredients, most especially, the butter and water.  You don't want the butter to melt at all before putting your pie in the oven.  The liquid molecules in the butter are released as your pie bakes and these lovely steam pockets are what causes dough to be flaky.


2.  When your dough is ready, it will resemble cornmeal.  That's what you're looking for.  And, always better to slightly under mix then over mix.


3.  NEVER, EVER pulse or mix your ingredient until it forms a ball. Ever. If you work the dough to this stage, any hopes of a flaky crust are done. 

4.  When ready to roll out the dough, flour your board/clean counter top and rolling pin. Roll from the center outward. Quarter turn the dough and repeat.  Use a bench scraper to help turn the dough. Keep rolling and quarter turning until you reach the desired thickness.  When I'm pretty sure it's close to the thickness and circumference, I place my pie plate in the center of the dough and carefully lift the sides of the dough.  You want the dough to come up slightly over the top of the plate since the dough will shrink a bit in the oven.  This will assure you have enough dough to crimp the edge or at least not shrink too much if you use a tart pan. 

5. You can lattice the dough or use cookie cutters to make a more festive pie top.  I used star shaped cookie cutters for this one. Or you can simply roll out a standard top pie crust.  Just be sure to cut a few slits on the top to help the steam escape while baking. Lattice tops and more decorative tops to pies look pretty and are functional as well.

Here's to the sunshine and my sweet dad.

Enjoy!

MJM

Friday, January 9, 2015

Lovely Lentil Soup

It's been how long?  Well...let's not focus on the past.  It's a new year and I'm excited to be back in the blogosphere.  While I still stick to this not being a blabby life blog, the year has been a big one!  

We moved from Seattle back to the east coast and have been enjoying every second complete with a new home and shiny kitchen to cook and bake my way through the coming year.  Please send me comments or questions or recipe requests! 


While it may be a new year, the basis for my recipes has not changed.  Do it the old fashioned way- no pre-made stuff, no packaged dough (of any kind).  Use fresh herbs and spices and be sure to procure your dairy, meats and veggies from reliable, local, human friendly places.  Not everything needs to be organic, per se, but be an informed consumer. 

What is more important then what we put into our bodies?? 

OK, onto the food...


I'm kicking this year off with a recipe I received from my sweet Aunt Sue, who referred to it as "more of an experiment then a recipe".  In passing the recipe along to me, she recalled writing down the instructions from her mother in law, on the back of an envelope, while riding in a car-maybe 35 or so years ago! 


Now, years and years later, this soup is still being cooked up in her Austin kitchen and has graced many a bowl in all of my Austin, Boston, Seattle, New York and Norwalk kitchens!  Needless to say, it's a keeper.  

I've altered it a bit, but only Aunt Sue would know.  Here's my take on that original recipe.  Let's pay homage to a lovely lentil soup classic on this cold and snowy day. 


This makes for a big pot of soup.

1 bag of dried lentils, thoroughly scanned to assure no little rocks hiding among them.
3-4 celery stalks, diced
2-3 carrots, diced
1/2 yellow onion, diced
2-3 cloves garlic, minced
2 cups tomato 
purée** (see notes below)
1-2 quarts chicken or vegetable stock
Splash or two of red wine (no cooking wine!)
Salt and crushed red pepper
Parmesan rind or Pecorino slice
Fresh thyme (2-3 sprigs) and chopped sage (4-5 fresh leaves)

1-3 bay leaves, fresh or dried


  1. Coat bottom of large heavy bottom pot with olive oil and heat to medium.
  2. Add onion and garlic and over low to medium heat, sweat these veggies until soft.  You want to cook them gently as opposed to sautĂ©ing or caramelizing them.
  3. Once onions are translucent and softened, add carrots and celery.  Cook until softened.
  4. Add lentils, chopped sage, thyme, tomato purĂ©e, wine, cheese and bay leaves.  Cover with stock or water.  You want to have twice as much liquid as the veggie/lentils mixture.
  5. Bring to boil then reduce to simmer for 35-40 minutes or so.  Check the lentils.  If you like softer lentils, cook longer.  Otherwise, shut off heat and let sit, slightly uncovered for an hour or longer. You may need to add more stock or water if the soup gets too thick.  Always have more stock on hand to thin out soup.  You can add water, but it may dilute all that deliciousness you've been working on.
  6. Before serving, take out bay leaves and any thyme stems. Drizzle each serving with good olive oil and serve extra grated cheese.  I add a few pinches of crushed red pepper.


NOTES: If you don't have any homemade tomato purée on hand, there are a few good store bought options. Try Pomi brand or any tomato purée in a box or glass jar. Avoid cans whenever possible, especially canned tomatoes. You want BPA free food containers and the sure fire way to do this to step away from the cans!

As with every soup, this will taste better the next day and the day after that. The longer it sits, the more delicious. Leftovers will last in the fridge for a few days. It freezes well, too.  Make some of this crusty bread to go along with it!


Thanks for the inspiration, Aunt Sue!


Happy New Year and keep making it From Scratch! 


MJM


Wednesday, April 3, 2013

Berry Almond Streusel Cookies


Good glory!  Who knows why it’s been so long…but these little squares are delightful.  Sweet, tart, perfect.  More to follow, my friends.  In the mean time, start your ovens.


16 Tbs unsalted butter, softened but still cool
1 cup granulated sugar
1 egg yolk
1 tsp vanilla extract
¼ tsp salt
2 cups all-purpose flour
1 cup toasted almonds, finely chopped
1 tsp ground cinnamon
1 cup dried cranberries or cherries
1 cup Berry Preserves (I like Four Fruits, Bonne Maman)

Preheat oven to °350
Lightly grease bottom of 9x13 glass pan

1.    Using a food processor, finely chop almonds.  Heat a pan over medium heat on the stovetop.  Add almonds and cinnamon and toast until fragrant.  Be careful not to burn them! Set aside and allow to cool.
2.    Using a stand mixer with paddle attachment, cream butter and sugar together.
3.    Add vanilla and egg yolk and mix thoroughly
4.    Add flour, salt and ¼ cup of the toasted almonds mixture.
5.    Mix until ingredients are all incorporated.
6.    Remove approximately ¾ of the dough and press into the pan.
7.    Streusel topping: Add the rest of the toasted almond mixture into the remaining portion of dough along with dried cranberries.  Mix well.
8.    Spread the preserves on top of the dough in the pan and break apart the streusel evenly across the top of the preserves.
9.    Bake on middle rack for 25-30 minutes or until edges are golden brown.  If using a clear glass pan, carefully look at the bottom to make sure the crust is golden brown.  If still pale, bake another few minutes.  Allow to cool completely before cutting.

Enjoy!!
MJM

Friday, January 11, 2013

Sea Salt Caramels

Soft, chewy and salty caramels.  Enjoy as is, dropped into a mug of hot chocolate or added to cookie dough for a salty caramel twist.  Any way you choose, these are yummy little guys.  


Sea Salt Caramels
Makes about 100 candies

2 cup heavy cream
10 tbsps unsalted butter
2 tsp sea salt
3 cups sugar
½ cup light corn syrup
2 tbsp vanilla extract
½  cup water
Extra sea salt for sprinkling (optional)

Special equipment: candy thermometer, parchment paper (for cooling), wax paper (for wrapping)

You can easily halve this recipe.  If you do, use a smaller, 8 inch baking pan lined with oiled parchment.  But if you’re going through the trouble to make candy, why not make a bunch?  They keep for a few weeks in an airtight container after you wrap them and they are great for gifting.

On to the recipe!

1. Line the bottom and sides of a half sheet pan (also known as a small jelly roll pan) with parchment paper, then lightly oil the parchment.  Sprays work best here.

2. In a small saucepan, bring cream, butter, and salt to a boil.  Once it’s reached a boil, remove from heat and set aside.

3. In a large, heavy bottom pot, boil sugar, corn syrup, and water. Be sure to stir until sugar is dissolved.

4.  Once sugar is dissolved, continue to boil WITHOUT stirring but gently swirl the pan, until your mixture is light golden in color.  At this stage, the longer you boil the mixture, the darker the color and the more intense (read as burnt caramel flavor) the mixture will be.  You can decide how far to take it!

5. Once you’ve reached the desired color, carefully stir in cream, butter and salt mixture. BE CAREFUL, this mixture will immediately bubble up!  Lower mixture to a simmer, stirring frequently, until caramel registers 248°F on the candy thermometer, 20-30 minutes (if you’re halving the recipe, halve the time!).  

6. When you reach 248°, remove pot from heat, mix in the vanilla and pour caramel into prepared baking pan.  Try to resist licking the spoon, that mixture is 248°…

NOTE: If you heat this mixture much above 248°, the candies will not be soft once they cool.  You won't ruin them; they will just be hard caramels.

7. After about 1 hour, sprinkle the top with a little sea salt (this is optional).  Let cool another hour before cutting.  Total cool down time is about 2 hours.    

8. Using a sharp knife and some oil nearby, cut caramel into 1-inch pieces.  Lightly oil your knife periodically to avoid mangling the caramel.  Finally, wrap each piece in about a 4-inch square of wax paper.  Twist the ends to close, and voila: homemade caramel candies.

CLEAN-UP TIP: Don't dread the stuck on candy and don't waste time trying to scrub it after the pan has cooled.  Just add water to the candy coated pan and place over medium heat.  The sugar will dissolve into the water and your pan has practically cleaned itself.


Happy candy making and here’s to a tasty 2013!

Enjoy,

MJM