Tuesday, March 27, 2012

L3Bs


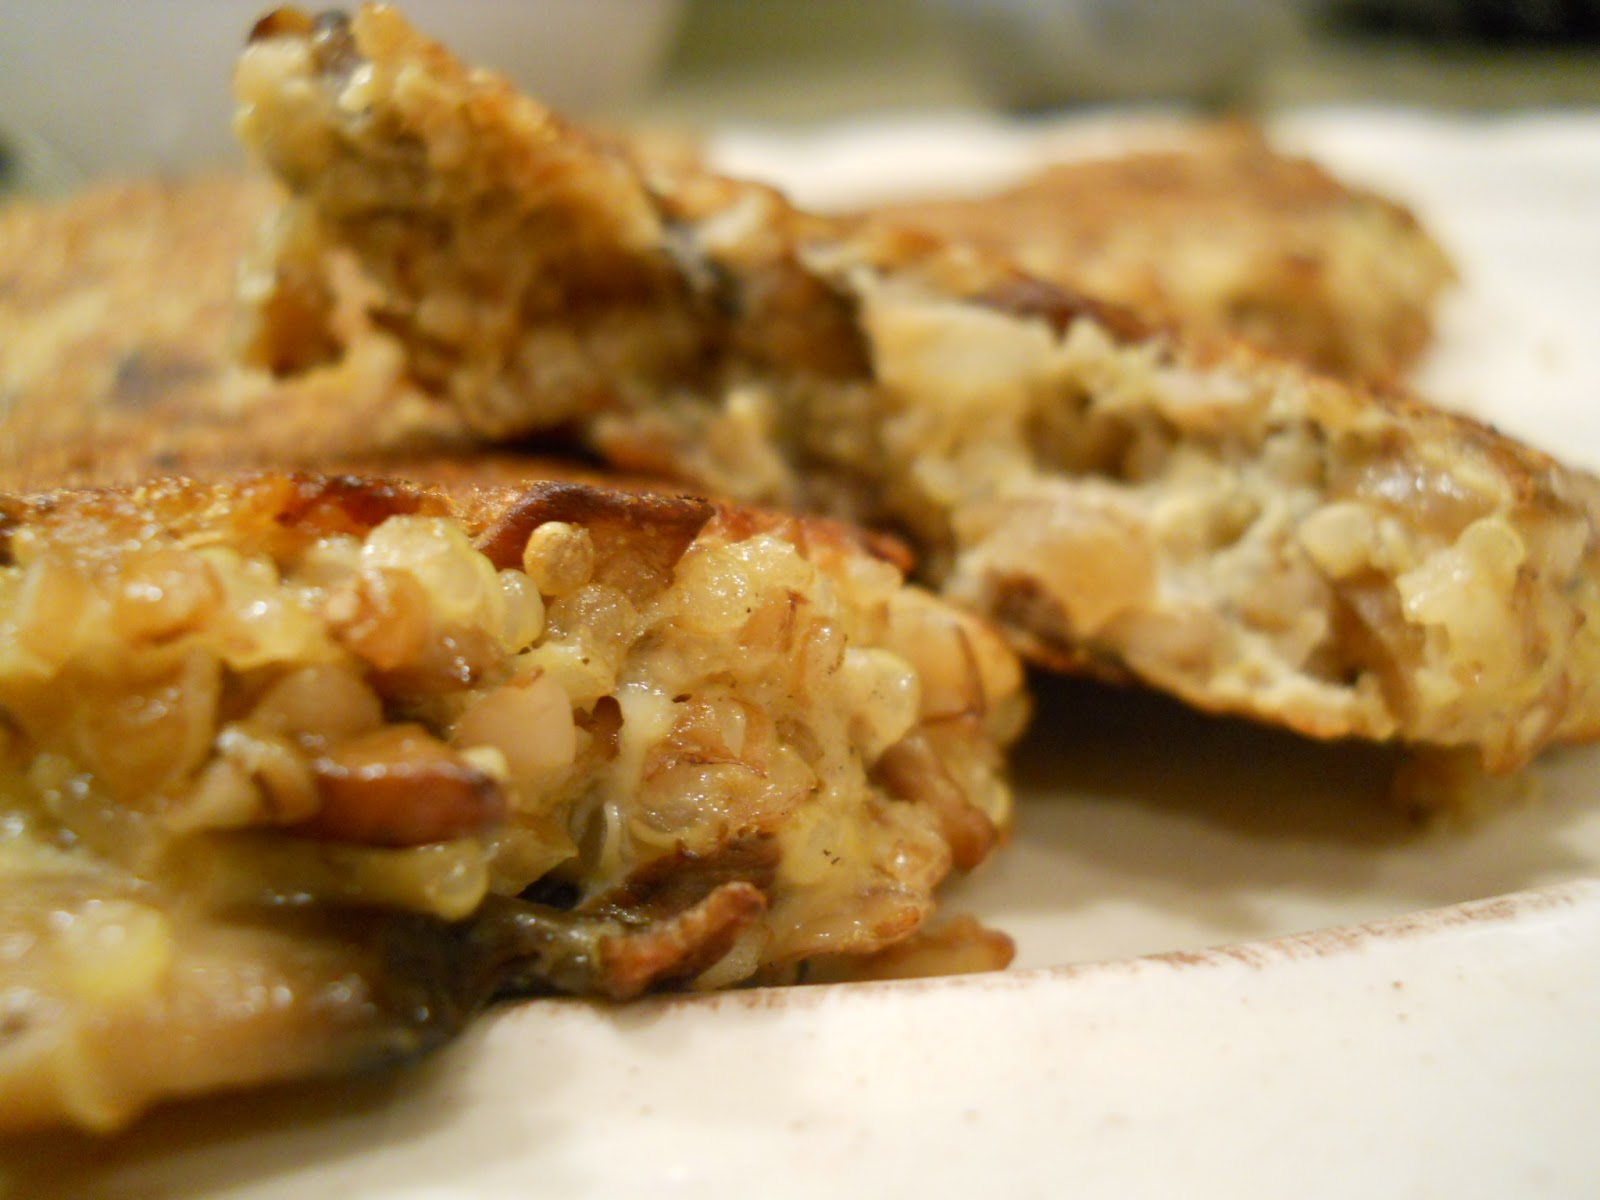
L3Bs?? I had to get your attention and lentil, bulgur and bean burgers or, perish the thought, veggie burgers might dissuade all the naysayers.  I’m not a vegetarian by a long shot, but these are delicious.  Some days I throw in some mushrooms, too.  You can make these into patties or bake the mixture in a loaf pan.  You can even jump on the ‘cupcake’ bandwagon and bake them in muffin tins to serve as a side dish...I'll try not to judge you.  I just like mine topped with a little Greek yogurt and olive oil drizzle.  Yes, Sriracha works too, as it does with everything else these days.

¾ cup dried lentils, rinsed and picked over
¾ cup bulgur or quinoa
½ cup cooked black beans, fresh or canned
¼ cup pumpkin puree (canned is fine, found in the baking aisle)
½ large red onion, chopped
4 celery ribs, chopped
3 medium cloves garlic, chopped
1 tsp freshly grated ginger
½ cup Panko
2 large Eggs
Pinch red pepper flake
Olive oil
Salt


1. Bring 3 cups water, lentils, and 1 teaspoon salt to boil in medium saucepan over high heat; reduce heat and simmer, uncovered, stirring occasionally, until lentils are just beginning to fall apart, about 20 minutes. Drain off liquid and place in a large bowl.

2. While lentils simmer, bring 2 cups water, about 1/2 teaspoon salt and either bulgur or quinoa to a boil in saucepan. Simmer for 10-15 minutes, then cover and let stand off heat for another 15 to 20 minutes. Drain off any extra water. Transfer bulgur/quinoa to lentil bowl.  If using whole grain bulgur (Bob’s Red Mill brand, you’ll need to cook your bulgur a little longer.  Refer to cooking directions on label).

3. Heat oil in nonstick skillet over medium-high heat until.  Test with a drop of water- if it pops, it's ready.  Add onions, celery, and garlic.  Cook until vegetables begin to brown, about 10 minutes.  Add beans and pumpkin and cook another 5 minutes.

4. Combine bulgur and lentils and vegetable-bean mixture. Transfer half of mixture to food processor and pulse until coarsely chopped (about twenty 1-second pulses). Transfer processed mixture to large bowl; repeat with remaining unprocessed mixture and combine with first batch. Stir in panko, salt, and red pepper flake to taste. Add eggs and mix thoroughly.
 
Loaf: Add mixture into greased loaf pan and bake at 350° for about 45 minuteds to 1 hr.  Top should be browned and loaf firm to touch.  Let cool 30 minutes before slicing.

Burgers:
Divide mixture into 12 portions, about 1/2 cup each and form into patties. Heat oil in nonstick skillet over medium-high heat and cook burgers, 4 at a time, until well browned, about 4 minutes per side, lowering heat to medium if browning too quickly. Repeat with additional oil and burgers.

Enjoy some clean living (every once in a while).

MJM

Pretzel Pork and Mustard

I know...I know, it's been awhile.  I haven't forgotten you. This recipe might make up for it.
 

I’ve used both pork tenderloin, sliced into medallions and blade chops.  This pic is of the blades and although it’s not the leanest cut, it’s delicious.  Live a little.  Go to the store right now and buy some pork and pretzels.

2 cups crushed pretzels
1 pork tenderloin (most packages come with 2) or 4 blade chops
½ cup yellow mustard or any that you prefer
1-2 eggs, beaten
½ tsp smoked paprika (spicy or ‘sweet’)
¼ cup oil plus more

1. Slice pork tenderloin into medallions, about ½ - ¾  inch thick.  Sprinkle with paprika and place pork in a Ziploc.
 
2. Add mustard and make sure all the pork is coated.  Add more mustard if necessary.  Place pork in the fridge for 30 minutes or up to 2 hours to marinate. The vinegar in the mustard with help to further tenderize the pork, but leaving it too long will cause the pork to get mushy.   

3. Using a food processor or a mortar and pestle, crush up the pretzels until they look like coarse sand.  Keeping a few chunky pieces adds nice texture.

4. Take pork out of the fridge about 30 minutes before cooking to take the chill off the meat.  This helps with even cooking.

5. Beat your eggs in a medium size bowl and one piece at a time, dip your pork in the eggs, followed by a dredge in the pretzels.  Set aside until all pork in coated and you’re ready to pan fry.
6. Heat a skillet (preferably stainless) until smoking.  Add oil (olive oil or veg) to pan and swirl to coat.

7. Test your pan for high heat by sprinkling in a small drop of water.  If the oil “pops”, you’re ready to go.

8. Place a few pieces of pork (4-5) in the pan at a time.  Do not overcrowd.

9. Pan fry the pork for about 3-4 minutes per side depending on how thick you make your pieces.  Add more oil if needed.  Slightly pink (not raw!) centers are OK, but feel free to use a thermometer for accurate temps if you’re concerned.  145° is what you’re going for.

I like to squeeze a little lemon juice on top before serving.  Throw some mustard on the side, and you’re good to go.


Enjoy!
MJM  

Wednesday, February 1, 2012

Crumb Topped Banana Bread


Bread:
2 cups all-purpose flour
¾ cup granulated sugar
¾ tsp baking soda
½ tsp salt
3 very ripe/speckled bananas, mashed (about 1 ½ cups)
¼ cup plain yogurt or sour cream
2 large eggs
6 Tbsp unsalted butter, melted and cooled
1 tsp vanilla extract

       
Crumb Topping:
1 cup all-purpose flour
¼ cup sugar
½ tsp freshly grated nutmeg
1 tsp ground cinnamon
6 Tbsp unsalted melted butter

Preheat oven to 350°

Adjust oven rack to lower middle position. Grease and flour bottom and sides of nonstick 9x5x3-inch loaf pan and set aside.

Make the Crumb Top:

1. Mix together flour, sugar, nutmeg and cinnamon.  Add melted butter and mix with a fork until fully incorporated.  Use your hands to break up the mixture into crumbs. Set aside.

Make the Bread:

1. Whisk together flour, sugar, baking soda and salt in large bowl; set aside.

2. Mix together mashed bananas, yogurt/sour cream, eggs, butter, vanilla, walnuts and chocolate (if using) in medium bowl. Lightly fold banana mixture into dry ingredients with rubber spatula until just combined.  Batter will look thick and chunky. Scrape batter into prepared loaf pan and add the crumb topping over the batter.

3. Bake until loaf is golden brown and toothpick inserted in center comes out clean, about 50-55 minutes. Cool in pan for 5 minutes, then transfer to wire rack. Serve warm or at room temperature.

Enjoy!
MJM

Pin It

Sunday, January 22, 2012

Quick Dilly Garlic Pickles


Love these little guys.  Let them hang out for 24 hours and boom. Done.  These can be canned, but will keep in an airtight container for as long as an opened jar of store bought ones.  I rinse them, and refresh the brine before storing to prevent them from getting too salty and soggy.

Cut them into spears, halves or rounds.  Use cucumbers, asparagus, string beans….whatever.

Recipe for small batch pickles

1 large English cucumber or small pickling Kirby cukes
1 cup white vinegar (not white wine, just the plain cheap stuff)
1 ½ Tbsp salt or 2 ½ Tbsp kosher salt*
Pinch crushed red pepper
4 garlic cloves, smashed
5-6 sprigs of fresh dill, cleaned

5.5 cup Tupperware

*Note on salt:  Since this is a quick pickling process and I did not can these, I used regular table salt.  You can use pickling salt if you are going to can your pickles.  The only difference between the two is that pickling salt won’t make your brine cloudy.

1.    Cut cucumber in half and then quarter each half.  Or cut cucumber into rounds.  Set aside.

2.    Crush garlic with the flat side of a large chef’s knive and remove peel.

3.    Layer cucumbers with garlic and dill sprigs in a container that holds 5.5 cups.

4.    Heat vinegar in a glass measuring cup for 2 minutes.  Add salt and mix until dissolved.

5.    Pour brine over pickles and add pinch of red pepper flake.  Pour enough water over mixture until pickles are just covered.

6.    Pop the lid onto your container and give it a good swirl.  Place in the refrigerator overnight for best results.

7.    The next day, if the pickle tastes too salty or briny, drain liquid and refill container with enough water to cover pickles and 1 Tbsp white vinegar.  If you’re happy with them, leave them in the brine.  Either way, they’re ready to eat at this point.  Keep them stored in the fridge for as long as you would keep any pickles in an opened jar.

Enjoy!
MJM

Pin It

Tuesday, January 17, 2012

Seattle Snow Day Chili


This is a basic recipe that I always tweak.  I’m always changing the amounts of seasonings depending on the day.  For a more smokey flavor, use more of the smoked paprika and chipotle.  Swap out the jalapeno for a serrano or habanero if you like more heat.  I add roasted corn sometimes and maybe less beans if I serve it over rice or grains. Make it vegetarian with greens and all beans. Just make it yours. 

2 ½ lbs ground beef or turkey
1 Tbsp chili powder
1 tsp cumin
1-2 tsp sweet smoked paprika
*1 seeded chipotle chili plus 1-2 tsp adobo sauce
*1 seeded jalapeno, minced
1 medium yellow onion, diced
2 cloves garlic, minced
15 ounces diced tomatoes
15 ounces pinto beans
15 ounces black beans
2 cups stock (approx)
Salt and pepper

* Adds heat to chili; add less or more depending on spicy preference.  Chipotles in adobo sauce are found in most grocery stores either canned or jarred.

Standard sides:
Lime wedges
Avocado, diced
Cilantro- if you’re into it
Pepper jack, cheddar cheese
Sour cream

·        Use canned beans if you don’t have time for dried, but the texture and taste is better when you use dried.  For a quick soak:
o       Place beans in medium saucepan and cover with water.  Bring to a rapid boil and cook on high for 15 minutes. 
o       Turn off heat and allow beans to soak for 1 hr
o       Drain and rise beans and add to chili until tender

1.    In a braising pan or large pot over medium high heat, sauté onions, garlic, jalapeno, chili powder and cumin in olive oil until fragrant.  Mix in chipotle and adobo sauce.

2.    Add turkey or beef and break apart in pan.  Mix to combine all ingredients.

3.    Add diced tomatoes and cook until meat is mostly cooked through.

4.    Add beans and enough stock until desired consistency is reached.

5.    Simmer on low for another 25 minutes until meat is completely cooked through and flavors have melded.  Taste and adjust any of seasonings.  Add more stock if you like.

6.    Serve on its own or over steamed quinoa, rice or other grain.

7.    Squeeze a little lime over top before adding cheese, sour cream and top with diced avocado and chopped cilantro.

With a glass of Malbec, this is even better.

Enjoy!
MJM

In does, in fact, snow in Seattle


Pin It

Tuesday, January 10, 2012

Insanely Delicious Roasted Garlic Potato Bread


Prep time: 35 minutes
Resting time: 2 hours and 40 minutes
Baking time: 35 minutes per two loaves. Yields 4 small loaves

1 whole head garlic
3 cups lukewarm water
2 packets yeast (or 1 ½ Tbsp)
2 tsp salt
1 ½ Tbsp sugar
1 cup mashed potato                                 
6 cups bread flour (King Arthur flour is my favorite)
Cornmeal for baking


Equipment: Stand mixer or food processor, pizza peel and pizza stone

  1. Place pizza stone on the middle rack of your oven.

  1. Wrap the garlic in aluminum foil and roast for 30 minutes in a 400°.  When cool, cut off the top of the head and squeeze out the garlic cloves.  Set aside

  1. In stand mixer bowl, (at least 5 quart) fitted with dough hook, food processor (14 cup) fitted with dough blade or large mixing bowl: mix yeast, salt, sugar, mashed potato and roasted garlic with the water.

  1. Slowly, add the flour until fully incorporated.

  1. Cover, loosely, with plastic wrap (not airtight) and allow dough to rest at room temperature for about 2 hours.  Dough will rise and then collapse to a flattened top.

  1. Liberally sprinkle cornmeal onto the pizza peel and set aside.  Heat oven to 450° and place a jelly roll pan or any lipped baking pan on rack below your pizza stone.

  1. After 2 hours, lightly flour your hands and remove the dough from bowl.  Divide into 4 relatively equal pieces (about the size of a grapefruit) and form into a ball or roll into a baguette shape.

  1. Place dough onto the pizza peel and let rest another 40 minutes at room temperature. Depending on how large your peel and baking stone, you may only be able to fit two loaves at a time.  Refrigerate any unbaked dough in a covered, but not airtight container for up to 3 days.

  1. After 40 minutes, sprinkle flour over your loaves and slash a cross or any design with a serrated knife over top.

  1.  Slide the dough off the peel onto the stone, carefully.  Pour 1 cup of warm tap water into the pan below and close the oven door quickly to prevent the steam from escaping.  This will help form a nice crusty exterior to your bread.

  1. Bake for about 30-35 minutes until exterior is deep brown and firm to the touch.  Adjust your baking time if you make your loaves larger or smaller.

  1. Try to allow bread to completely cool before ripping it apart.  Best served warm with extra virgin olive oil, or basically anything you have.  This bread is fantastic.


This recipe works just as well if you halve it and it freezes really well.  Bread baking is not as hard as you might think...for a simpler recipe, look back at an earlier post for Bread Baking.

Enjoy!
MJM

Recipe adapted from Artisan Bread in Five Minutes a Day.
Pin It

Oven Roasted Tomatoes

If you’re tired of tossing limp tomatoes, try this. A recipe best used when you’re planning on being home for 6-8 hours and completely worth it.


Put these guys on bread as is or with a little fresh mozzarella for a nice appetizer. Sauté them with roasted garlic and toss with macaroni and fresh basil. Puree them to make a smooth sauce. Add them to sandwiches or salads….options are endless.

It’s as easy as the ingredients:

Plum tomatoes, as many as you have
Olive oil
Garlic, depends on how much garlic you want to use
Salt
Pepper
Crushed red pepper flake (optional)

Preheat oven to 350°


  1. Line rimmed baking sheet with aluminum foil and place cookie cooling rack on top.

  1. Lightly oil rack and set aside

  1. Halve the tomatoes and with your fingers, remove the seeds.

  1. Place tomatoes cut side up onto baking sheets, drizzle oil and sprinkle salt, pepper and red pepper (if using)


  1. Place pan in oven and leave oven door slightly ajar.  This allows the liquid to evaporate from the oven and intensify the flavor of the tomatoes.

  1. After 4 hours, lower heat to 250°and continue to roast until tomatoes appear dry and shrunken.

  1. While tomatoes are cooling on the rack, thinly slice as much raw garlic as you please. 

  1. When tomatoes are cool, layer them with the garlic in a reusable container and cover with olive oil.  Add more red pepper flake if you like.

  1. Place in the refrigerator for a few hours, best overnight, before using to get the most garlic flavor.  Or use immediately with roasted garlic.
Enjoy!
MJM


Tuesday, December 6, 2011

Mama Meatballs and Sauce

Back on track.  Happy cooking.


½ lb each ground veal, pork and beef (85% fat)
3-4 cloves garlic, minced
2 slices sandwich bread
¾ cup grated Pecorino Romano cheese
2 large eggs
½ cup (approx) milk
Olive oil
15-20 ounces crushed tomatoes, preferably San Marzano
Handful of fresh basil leaves, whole
¼ (approx) of red wine- don’t overthink this
Salt, crushed red pepper flake

Preheat oven to 350

1.    In a large baking dish, add crushed tomatoes, wine and basil.  Set aside.
2.    Add all meat in a large bowl and break up to combine
3.    Add garlic, cheese, red pepper (optional) and with your hands, evenly mix into meat.
4.    Place slices of bread in a small, separate bowl and pour milk over until liquid is fully absorbed.  Break up bread into pea size pieces and add to meat.  Gently fold bread into meat.
5.    Lightly beat eggs and add to mixture, again, gently incorporating the liquid into the meat.  Do not over work your meat once you add the wet ingredients!
6.    Heat a large skillet on high and coat with olive oil.
7.    Always test your mixture before forming and cooking all the meatballs.  Place a tablespoon size of your meat into the pan and cook through.  Taste your food.  Add more garlic, cheese or salt if needed.  I don’t add salt in the beginning because of the saltiness of the cheese.  You can always add it at this point if you want.  
8.    Begin forming your meatballs and be gentle.  Do not compress the meat with your hands; carefully form the meat into the size somewhere between a golf ball and baseball.

9.    Add 8-10 meatballs at a time to the skillet and brown on all sides.  Continue in batches until meatballs are all browned, adding them to the sauced baking dish.  Finish cooking the meatballs in a 350 oven for about 20 minutes, checking after 15 minutes.
10.       Serve along side macaroni, on a hero with some fresh mozzarella or straight up.  Don't forget the sauce!


Variations: 
Add ground turkey instead of beef, which I actually prefer so long as you use dark meat ground turkey.  You need a bit of fat in these guys to make it nice.

Skip the skillet and place meatballs straight into the oven, cooking time will obviously be longer.

Enjoy!
MJM
Pin It

Friday, November 18, 2011

Baked Macaroni and Cheese

2 cups béchamel (classic white sauce)*
½ medium onion, minced
1 shallot, minced
1 bay leaf
¼ tsp paprika
2 ½ cups grated cheese (cheddar, pecorino romano and fontina)
3-4 ounces pancetta, diced; bacon also works if you like it smoky J
½ lb pasta (cavatappi, medium shells or rotini)
½ cup sautéed breadcrumbs**
4 TBS butter cut into pieces plus more for greasing baking dish
Salt and pepper

Preheat oven to 350°

1.    Butter a deep 1 ½ quart baking dish
2.    Sauté diced pancetta over medium high heat until browned.  Set aside on paper towel to absorb any oil.
3.    Prepare white sauce and add onion, shallot, bay leaf and paprika.  Gently simmer over low heat for 15 minutes, stirring frequently.
4.    Remove from heat, remove bay leaf and stir in pancetta and about 2/3 of the cheese mixture.  Reserve the rest of the cheese.  Season with salt and pepper.
5.    Cook pasta in super salty boiling water until al dente (about 6 minutes), drain completely and place in large bow.  Stir cheese/pancetta/béchamel mixture into macaroni.
6.    Add half of macaroni mixture to baking dish and sprinkle with half of remaining cheese.  Add rest of macaroni and top with remaining cheese. 
7.    Top with breadcrumbs and dot with small pieces of butter.
8.    Bake about 30-35 minutes until top is browned and crisp and macaroni is bubbling.

* Béchamel Sauce (Yields 2 cup)

8 TBS Butter
8 TBS Flour
4 Cup milk
1 tsp dry mustard
1 tsp salt
½ tsp pepper
Pinch nutmeg

1.    In saucepan, melt butter over medium heat
2.    Add flour and whisk until well blended
3.    Remove pan from heat and slowly whisk in milk
4.    Return pan to heat and whisk constantly until no lumps remain and mixture has thickened and is smooth (about 2 minutes)
5.    Mix in salt, pepper and nutmeg

** Sautéed Breadcrumbs

2-3 slices sandwich bread
¼ tsp salt
Pinch black pepper
Pinch cayenne pepper
2 TBS butter

1.    Toast bread until dry and crispy, allow to cool
2.    Crumble in bowl and toss with salt, pepper and cayenne
3.    Melt butter in medium frying pan over low heat.
4.    Add breadcrumb mixture and sauté until butter is absorbed and crumbs are toasted. 
5.    Spread out on paper towel and cool before using
6.    If making larger batch of breadcrumbs, use a food processor.


Enjoy!  
MJM